
- Kat

- Apr 1, 2022
- 8 min read
Disclaimer: Some of the links below are affiliate links, which means that if you choose to make a purchase, I will earn a commission. This commission comes at no additional cost to you! I have experience with all of these resources, and I recommend them because I find them useful, not because of the small commissions I make should you decide to buy something. Please do not spend any money on these products unless you feel you need them or that they will help you achieve your goals.

When I first started out in my business I had a general idea of what my process would be like, but I didn't have it completely identified. I hadn't taken the time to write it out, and I should have.
One of the best things I can offer all my clients is a streamlined, consistent experience.
If I could go back and do it all over again, I would sit down and plan out my full workflow, step by step, for what every client would experience. From the first contact to the last follow up email, I would make sure that every experience had the same framework. Every client has unique circumstances, so it's important to stay flexible, but a solid foundation has been incredibly helpful since I've implemented my new processes.
In order to make this happen I had to invest some time and effort into implementing certain tools and templates to make sure that every experience was consistent.
Step 1: The Steps
First I created the list of steps that a typical client goes through. I actually created several, based on the type of service they were buying. But they all had a flow in common. In my case as a photographer my flow includes the following:
What has to happen to book the session/event
The contact
What happens once they've booked, but before the session/event day
What happens on the day of the session/event
What happens after the session/event
Follow-ups
It seems pretty simple, but until I wrote it out this way, put the steps under each category and then set dates to them. My workflow is clearly tied to the session/event date, so everything that happens prior to that has to occur a certain number of days before. For example, the last step in the "What happens once they've booked, but before the session/event day" category is a reminder email that goes out a certain number of days before their booked session or event.
Also note, I put the contract separately, while others might consider it part of booking the client. I think it can be viewed as the last step of that category, but I also think it's THAT important for my process. It deserves it's own space in the workflow. Especially considering, sometimes there's some back and forth on contracts before they're fully signed by all parties. So don't be afraid to adjust the process for your own business to make sure it really works for you!
Need a little help getting your client workflow put together? I've got a worksheet to help guide you through writing out the process. The worksheet helps you plan out step by step how your client experience goes. Or if you'd prefer a more hands on experience, contact me to set up a consultation.

Step 2: The Tools
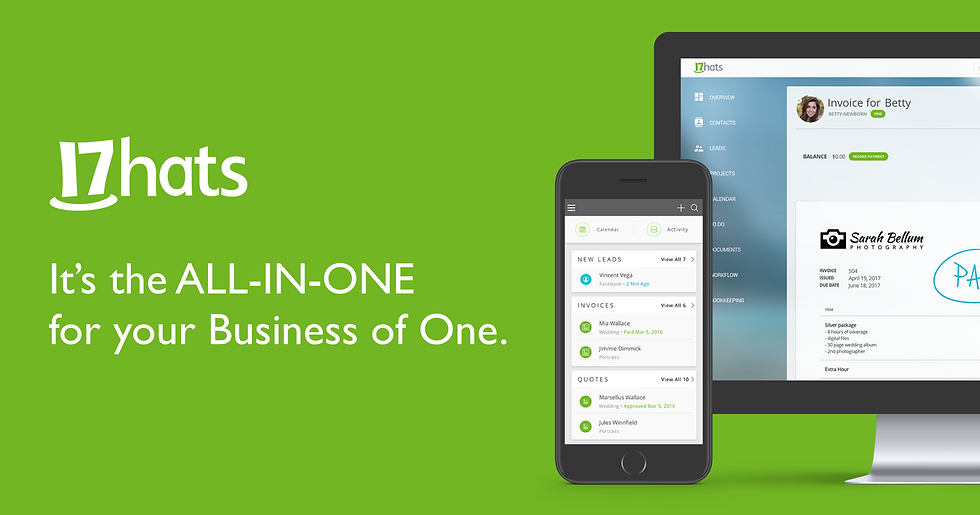
Once I had my step by step list of everything I needed to happen to book a client and all the information I needed to send them I needed to figure out how to implement this. I chose to use my CRM/Project Management tool: 17hats. It makes it fairly easy to make workflow templates, email templates, contract templates, etc. and assign them to projects. Each projects is a session/event. For me it was about digital access and streamlining, but make sure you find the tools that help you do that best. You can piece it all together yourself using tools you probably already have.
What the tools you use need to be able to do will vary from business to business but I believe you'll at least need:
Checklist for each client (your workflow)
Calendar
Lead forms
Templates of emails
A template of your contracts
Online scheduling if you provide consultations or services
Quote templates (if your business sends quotes)
Invoice templates/Receipts
Payment Methods/System (example: square, paypal)
Questionnaire templates
Samples/Promotional Materials
You can create these yourself in a variety of programs and tie them together on your own and use multiple systems. You can buy one entire solution system. Or you can mix and match and buy some tools and use others entirely on your own. I choose to do a mix with a system I like for many of theses, but my payments, invoicing and samples/promotional materials located outside my software.
My breakdown:
17Hats for checklists, calendar, email templates, quote templates, lead forms and questionnaires.
Paypal for invoicing, receipts and accepting payments
My website for promotional materials, guides, online scheduling and samples of my work.
Flodesk for delivering newsletters to subscribers and past clients.
Delivery Systems for delivering digital files and physical products to clients.
Step 3: The Templates
So now that I had chosen the tools I would use it was time to build out temples in all the systems.
Workflow or checklist template: I created templates for different types of services. For example as a photographer I needed a different flow for a family session vs a wedding. The checklist offers the steps I have to do as well as automated steps that happen on their own when certain criteria are fulfilled. The checklist also includes the dates on which each step needs to happen. This checklist is based very closely on the client workflow I did above.
Calendar: A place to get a visual of all the work I need to do and appointments I need to keep.
Online Scheduling: To make it that much easier for my clients to schedule their session, I put my online calendar with scheduling up on my website. This does three great things. The first is allow my clients to have the most options possible, without me possibly missing something. My calendar also take sunsets into account, and only allows sessions to be scheduled when lighting will be great. The second is to make it far less likely that anyone can double book. Once a session is on my calendar, the scheduling tool immediately removes it from the calendar! I'm only human and could make a mistake, but the system automates this. Third, it saves me time, so I can spend more time photographing, editing and providing great customer service. Rather than trying to dig through my calendar.
Lead forms: One of the first steps in a client experience (after seeing your website or social media) is contacting you. So the lead form is a very important tool that needs to be incorporated early into your workflow. My lead forms feed all my client information directly into my project management software (17Hats) and a project launches for them automatically. This then triggers a workflow or my checklist to be assigned to them if they've provided enough information for me to know what they're looking for. Important Note: You don't have to be limited to just 1 lead form that you place everywhere. It's great to have several different ones that fit their uses best. For more on lead forms check out my post on "Contact Forms and Lead Information."
Email Templates: All the emails that go out to every client (my welcome email, please sign my contract email, reminder of appointment email, follow up after the session email, and many others) are all templates. They have custom fields that fill in important client and session information (name, appointment date/time, etc.). What makes them great is that they go out automatically when scheduled. This keeps the process seamless, gets the client all the information they need and doesn't require me keeping up with as many tasks! I send many custom emails to clients for their specific situations as well, but these automated emails allow all clients to have all the information they need and nothing falls through the cracks.
Promotional Materials, Guides, Samples: I use my website to create guides and welcome pages for my clients. A local location guide for places to take photos, a wedding planning guide to help my wedding clients with their planning, my portfolio and examples of products they'd be getting.
Contract Templates: Nobody wants to have to reinvent the wheel, especially when it comes to legal documents. Getting a good set of contracts from your lawyer and implementing them into your workflow makes life so much easier. I have different contracts for different session types assigned to different workflows. I check them, set due dates and make special adjustments for clients and then simply hit send. 17hats allows all my contracts to be stored with the client record and more importantly, for the convenience of my clients, all signed digitally. They never have to print out a single piece of paper (saving trees)!
Quote Templates: For some design projects I send out quotes to be approved before beginning to work. If you need client agreement to work that requires a breakdown of services a quote is a great tool. Again, rather than reinvent the wheel, setting up templates with your business information and as much product information as possible, saves time and gets clients what they need faster.
Invoice/Receipt Templates: I use Paypal for all my invoicing and payments. They're a great company and offer one of the most diverse sets of payment options. Plus many of my clients are already familiar with them. To simplify the process I've set up templates for different invoice types and added my most commonly purchased services into the system to make it simpler to put together an accurate invoice. This helps speed things up and avoid mistakes!
Payment System Set-Up: Since Paypal is an integrated system the items available for my invoices are also available in the app for payments on location. The set-up is pretty seamless.
Product Delivery System: As a photographer I needed a way to deliver the photos in a way that's beautiful, easy to use for my clients and efficient for me. I have several ways I do that for clients. The first is a digital delivery system where I provide clients their photos in a beautiful digital gallery. From there they can order prints and other products. This system is integrated with my physical delivery of products, my photo lab. This gives my clients a seamless experience from receiving their digital images to ordering products that will last for years to come.
Questionnaire Templates: After I've completed everything I send out follow up questionnaires asking clients for their feedback or information about their session. Rather than create new ones every time, I use templates. This gives clients the opportunity to voice their thoughts and provides every client with the same opportunity. This helps me improve my customers' experience and know if there is anything that needs to be addressed! I personally really like Jotform and embed it into my website on a landing page. Then I provide a link to the landing page to my clients for easy access.

Step 4: Implementation
All of this is great, but until I put it all into use and began using all the systems together and following all my workflows consistently, the system wasn't going to be much help.
Making sure you follow through with your workflows and customer experience will make your job easier and your clients' experiences more positive.
I make sure with every client to follow all the steps I've outlined. This allows for personalization throughout the process, but also ensures that nothing important is missed. I never want to feel like one of my clients missed out on an important part of the experience because I made a mistake. Having consistent processes, with automated steps, organized checklists and templates lets me make sure that doesn't happen and every client gets my absolute best customer service. Need help with your workflow or implementation process? Check out my services to see if I can help make your business more streamlined.
What do you do to make sure you offer great customer service? How do you keep your customer processes organized? What do you do to streamline your business?


